
 |
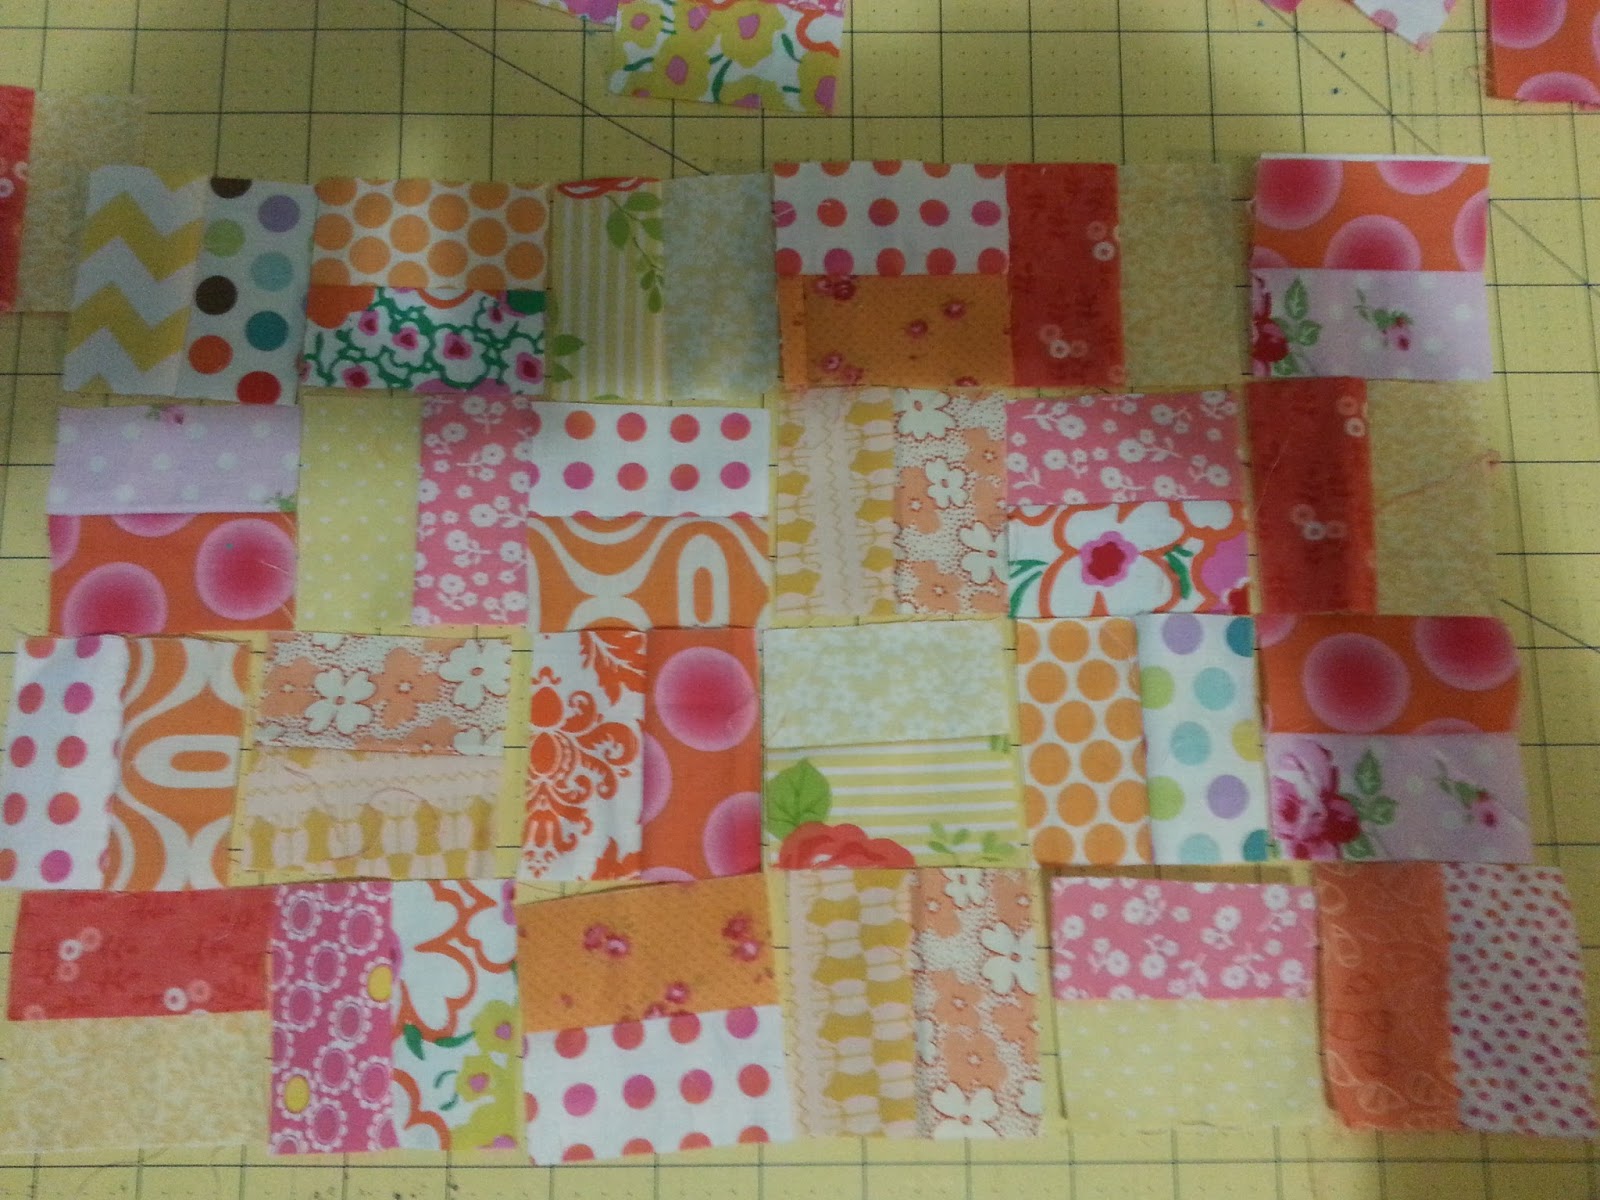
MATERIALS: Lots of scraps or different fat quarters, but enough to make 128- 1 1/2 x 2 1/2" strips.
1/2 yard of fabric for outside of purse
1/2 yard of fabric for purse lining
1 yard of iron on batting or regular batting
4 - 1 inch buttons
STEP TWO: Once you have all 1 1/2 inch strips sewn together cut them into 2 1/2 inch lengths. Arrange to a design you like then sew them together one row at a time turning every other square to make the design you see. After rows are sewn, sew all four rows together.Your finished size so far is 16 1/2 by 8 1/2 inches.
STEP THREE: Out of 1/2 yard fabric cut two pieces that measure 4 1/2 high by 18 1/2" long...this will be the top of the bag on both sides. Cut one piece that measures 18 1/2 by 3 1/2" long which will be the bottom. Sew all the pieces together as shown in picture. (The bigger pieces are the top of each side and the smaller piece will be the bottom of the bag).
.jpg) 
STEP FOUR: Cut a piece of batting which measures the same width and height as your bag. Mine was 18 1/2 by 28 1/4". If it is iron on then follow the directions, if it isn't then pin it down to your bag in several places. Now, quilt along your patchwork area in whatever fashion you desire. Can you see how I quilted mine?
STEP FIVE: Cut your lining fabric to measure the same size as the outside purse. If you want inside pockets now is the time to make them. I made mine with left overs which I lined so it would be stronger. I didn't use batting, just two pieces sewn right sides together and then turn with the small opening that I left. Sew your pocket onto your lining piece of fabric that measures the same dimensions as the outside of your purse.
 
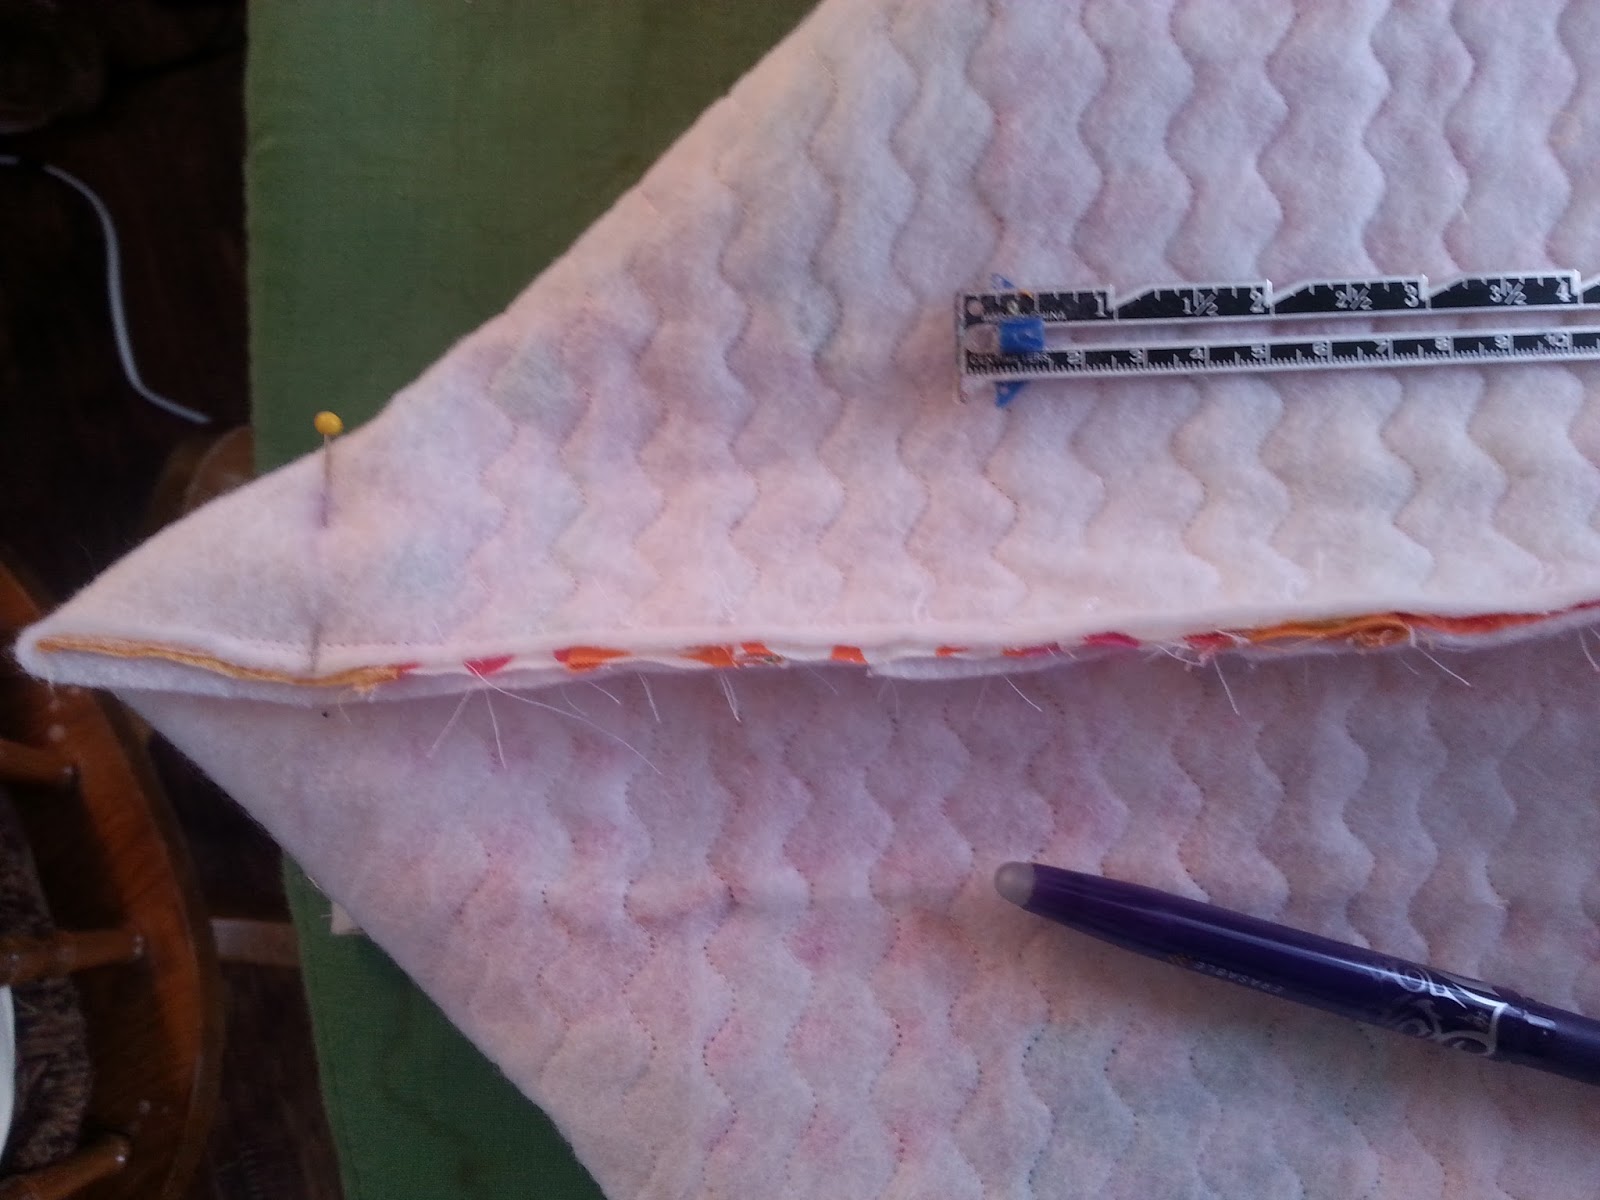
STEP SIX:Fold lining in half with right sides together. Stitch the sides up using the 1/4 inch seams. After you have sewn the sides you will be creating a base for your inside lining. This is kind of difficult to explain so I have a picture of how I did it on the outside of the purse. Line the side seams up so that the base of the lining looks like a triangle. (see picture) Measure in 1 1/2" and mark with a fabric pencil/pen, then sew across the line you drew, making sure to back space so stitching doesn't come out. Do this to both sides.
STEP SEVEN: Pin bag in half with right sides together making sure that quilted squares and fabric line up, (I wasn't careful the first time so I had to unpick :) Then stitch through all layers, (batting and outside purse fabric). Lining up opposite side seams and creating a triangle at the base sew across measuring 1 1/2" across like you did on lining.

STEP EIGHT: After sides are sewn together you will quilt along top edges of bag, as this will secure the lining to the outside. If you added pockets on the inside take care not to quilt where pockets are located. I stitched with five straight lines 1/2" apart beginning 1/2" from the top.
.jpg)  STEP TEN: Cut four strips 2 1/2" by 32" for handles. Cut two pieces of batting 2" by 30". Iron or baste batting down to one of side of handles. I cut the ends of my handles in a diagonal fashion but you could certainly cut them straight across.  STEP TWELVE: Sew handles down to bag 1 1/2" from each side. Do this with a needle and thread. I sewed the handle down with about six stitches then added the 1 inch button and sewed several more to make sure handle wouldn't fall off bag. AND YOU ARE FINALLY DONE! Seems like a bizillions steps, but it was actually very easy....I've now made two! One for my mother and one for me!  |
No comments:
Post a Comment