

Whew, this has been a LONG time in the making! I had an old dining table and chair set that I decided to refinish rather than buy a new one. I figured that I could do it all in a few days.... Now it's almost been a month!!! Let's start out this long story with the before photo of my lovely chairs.
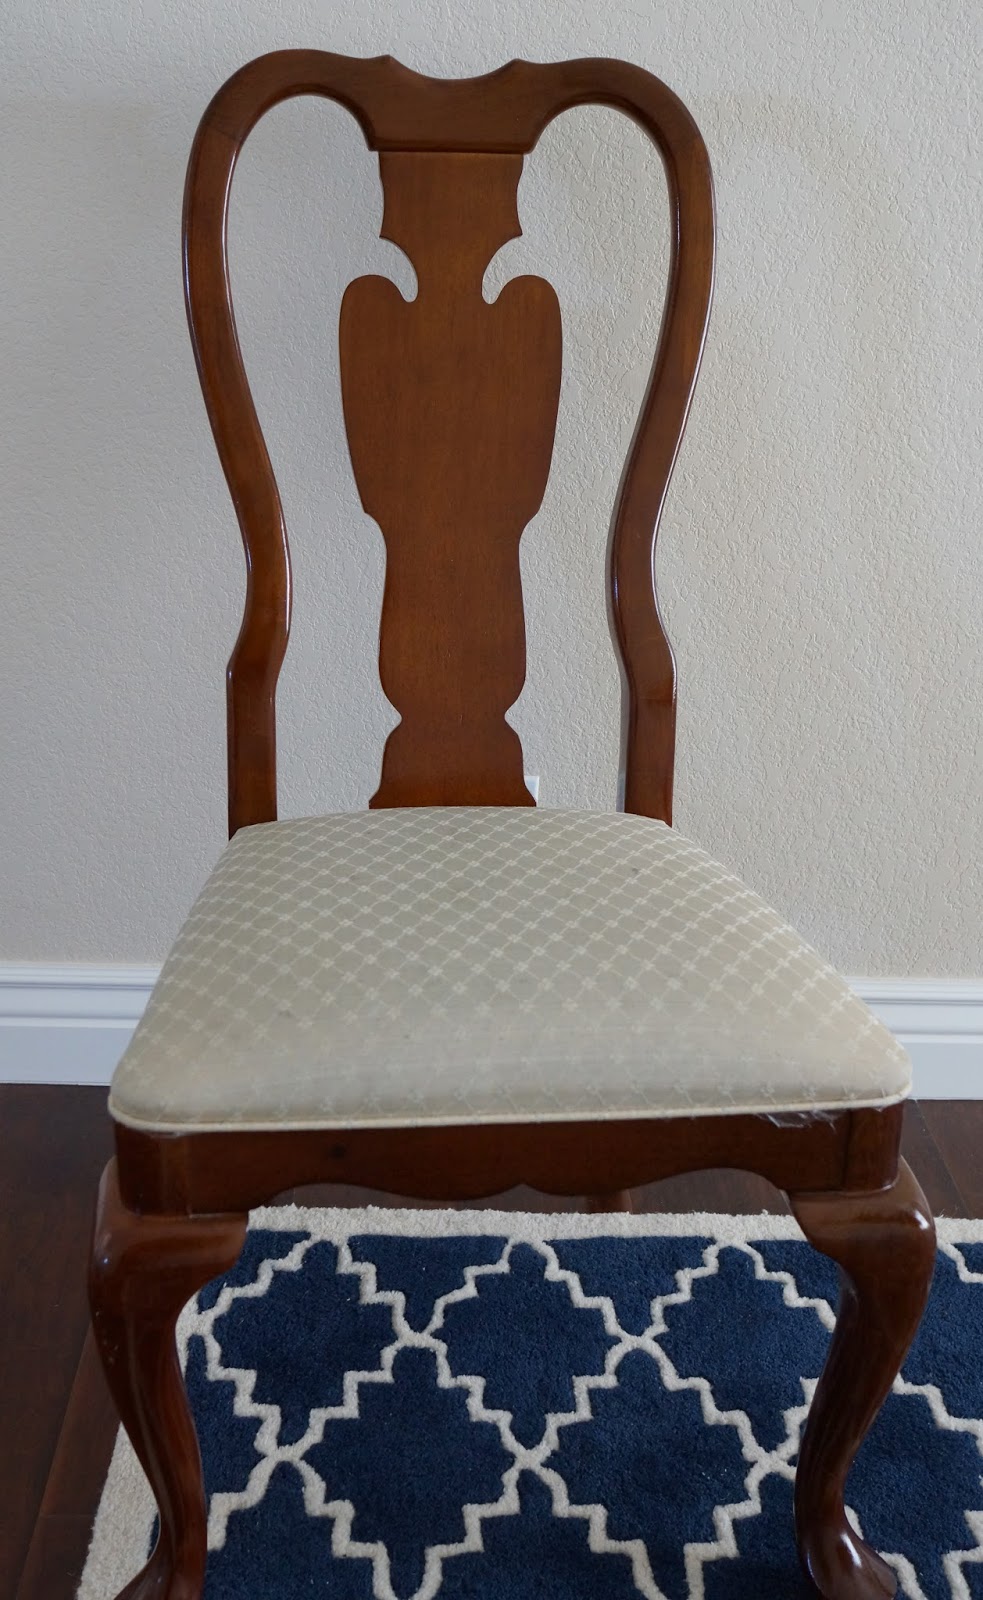
I never liked this chair. I hated the off white cushion and the dark, shiny, wood. I didn't want to have to sand, and prime these babies, so I found an alternative online.

Chalk paint! After reading about how great it was, I found my closest retailer (not so close) and went to check it out. The saleswoman at the shop could not stop telling me all the wonderful things about Annie Sloan's paint. She said I should only need to do two coats of paint and a wax finish. I was so excited to try it out for myself! I thought it would be a GREAT idea to paint my chairs in pure white so that I could show off a cute new fabric on my cushions. That was a mistake since I didn't realize how much detail these chairs have (did I mention that there are eight of them!). The dark finish on the chairs really hide all the little details, or maybe I just never cared too much to pay attention. I didn't realize what I was getting myself into! For the table I went with Paris grey.
Step 1: Remove the existing cushions, easy!
Step 2: Let the fun painting begin!!
Painting was really quite fun at first, the paint glides on easily, looks great, covered well. Soon I had four chairs done with one coat! I was gonna be finished in no time! OK second coat on.... And I realized that my hopes for only doing two coats of paint were dashed. My chairs were just TOO DARK to begin with! I got so frustrated by the third coat that I decided to work on the table.
Step 3: Paint table (I forgot to get the before pictures!). OK now that was easy!! The paint was gliding on, drying fast, and looking fabulous! Two coats and one wax later (I even did two coats of wax on the top since it was going to be used a lot) and my table was completely transformed. I LOVE, LOVE, LOVE the grey!
Step 4: Back to the chairs! Order more paint online because you ran out and you're too busy to drive 30 miles to get it (this seems very counter-intuitive since I ordered paint that was shipped from NYC!!! And.. It was going to take FOREVER to get shipped to CA! My paint came all the way across the country for me. I should have just driven!)
Step 5: While you're waiting on your paint to arrive, decide on a fabric to upholster with. I thought this would be really fun! But... Not so much. I really wanted something blue, but not too light (stains). I wanted something heavy (too expensive). I wanted mint green (too light and hard to find). Finally after wandering the isles at Joanns for the hundredth time I settled on this cute green. Then I took it home and decided not to use it. Then I decided to use it anyway. Isn't this a fun story!
Step 6: Remove pipping from chairs with staple remover that sucks at removing staples. I hated doing this. I left the original fabric on the cushions and only took out the 60+ staples on each seat to get the pipping off. There was NO way I was going to make new piping for the chairs. They look just great with out it!
Step 7: Cover chairs, FINALLY!!

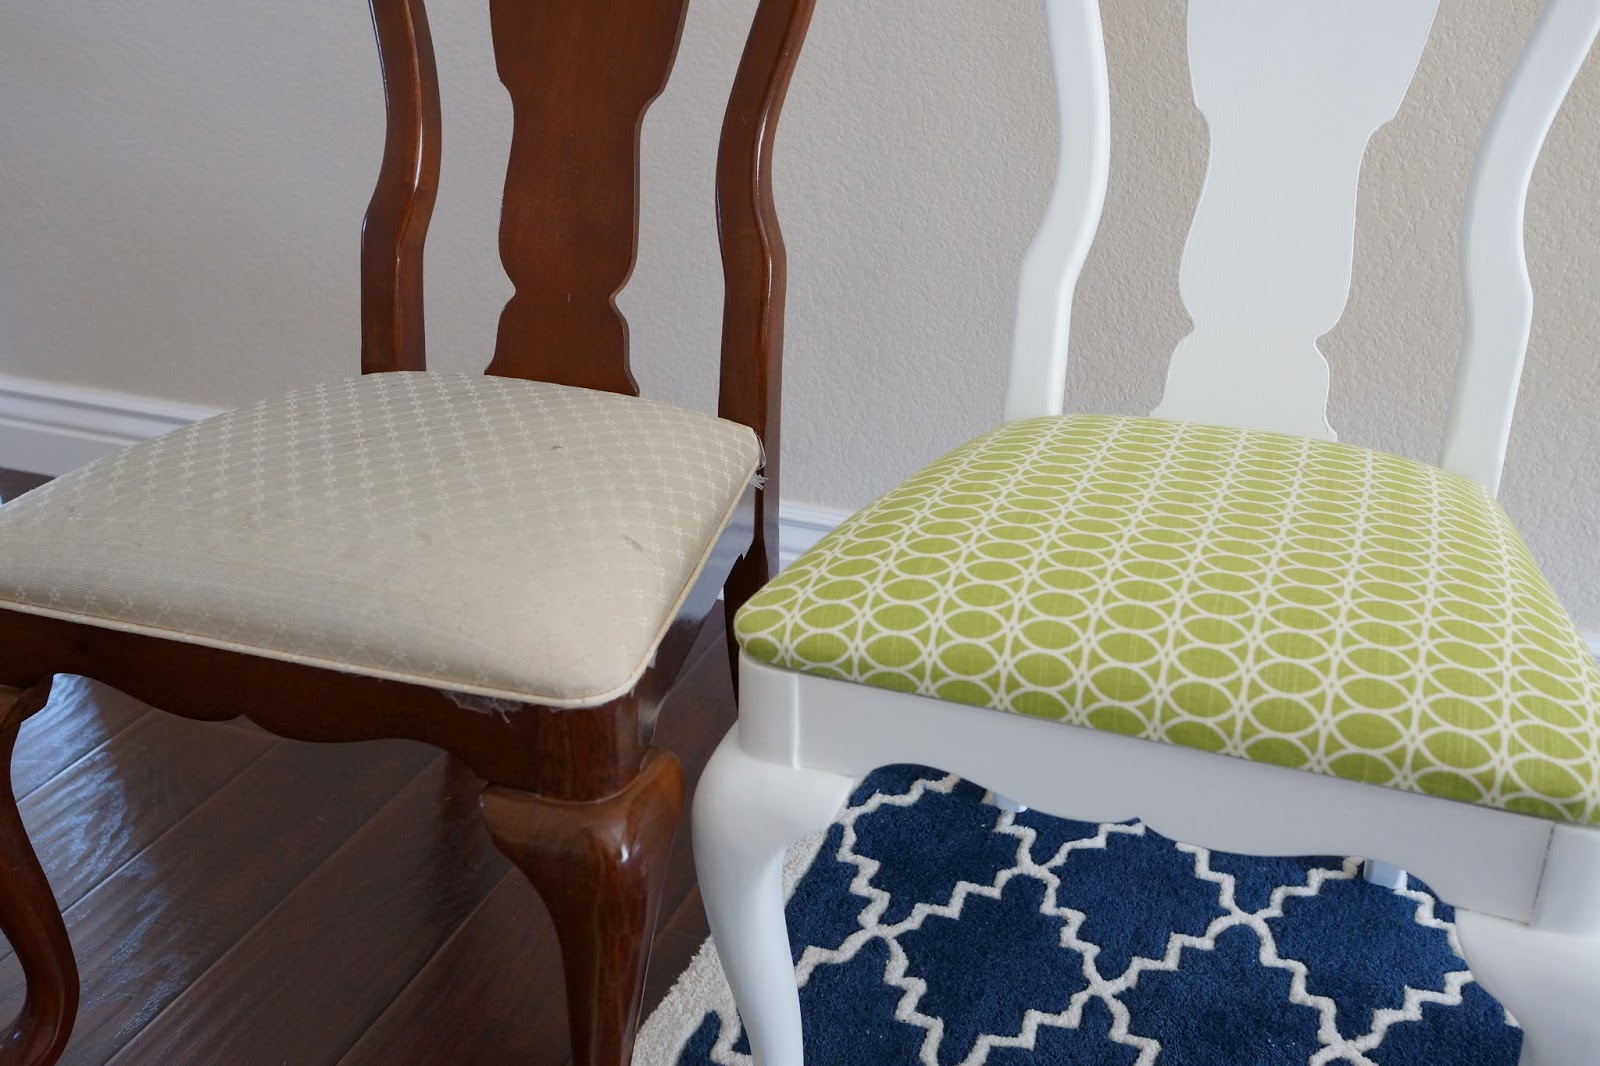
Before and after
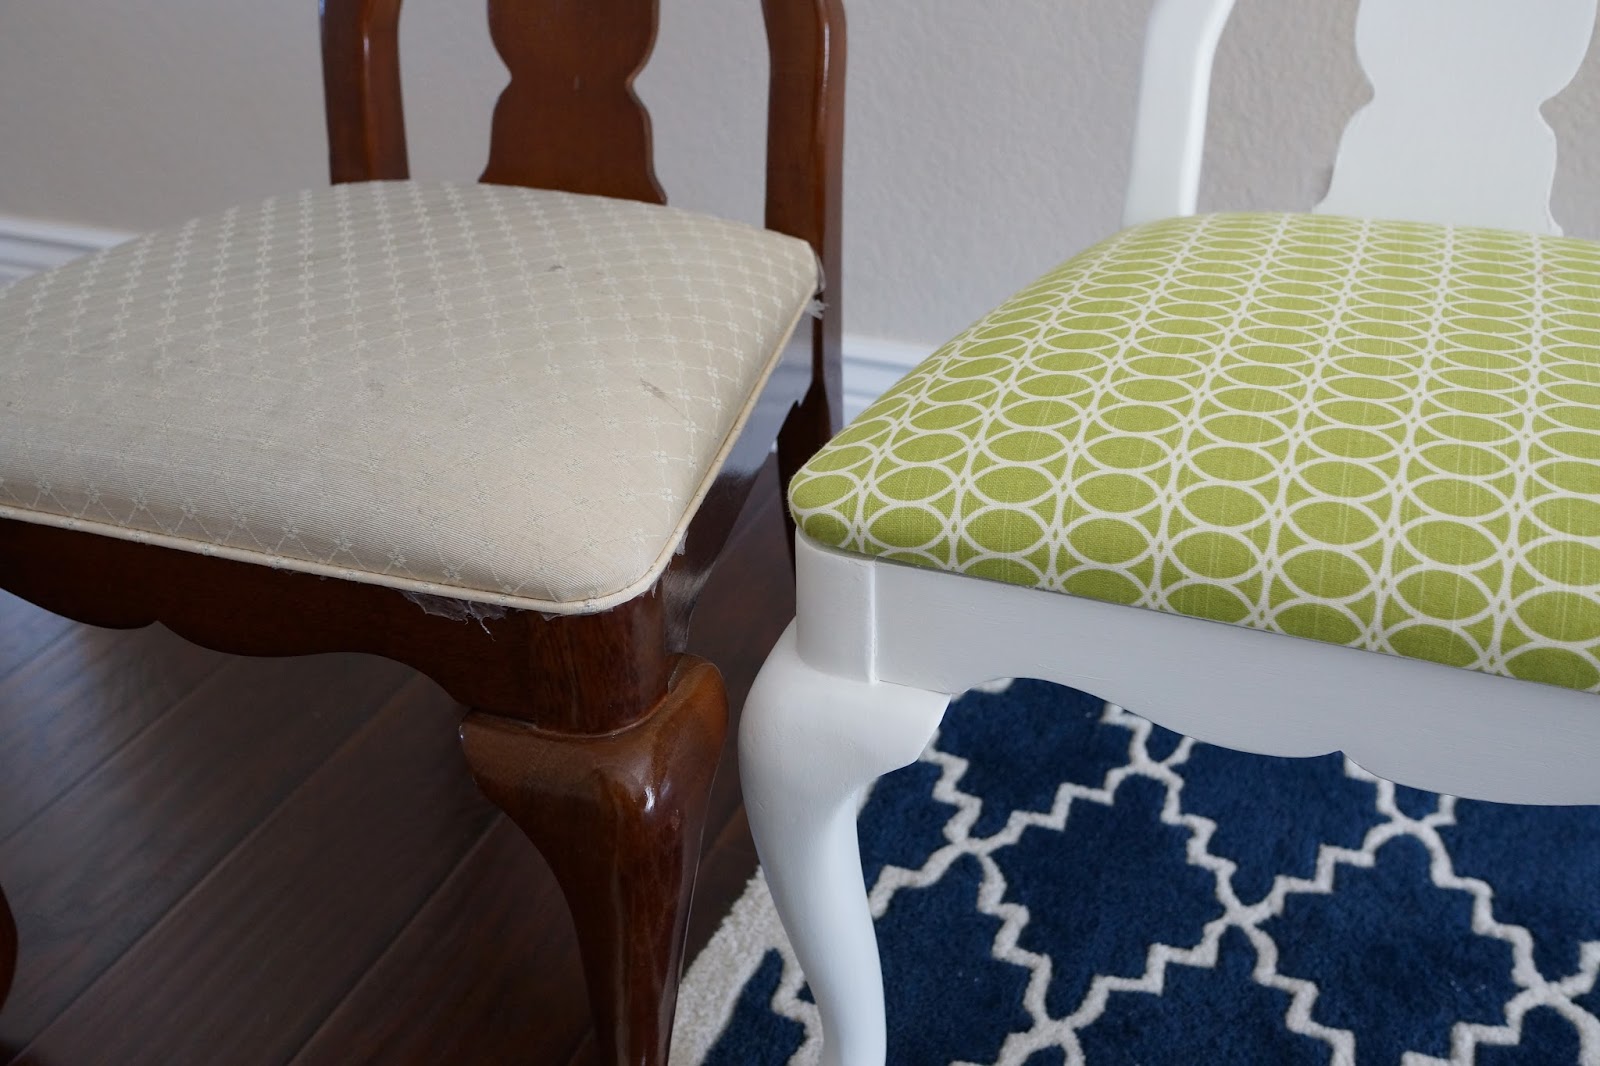
Seriously the chair on the left is just SO ugly... I can't get over what a HUGE difference there is!
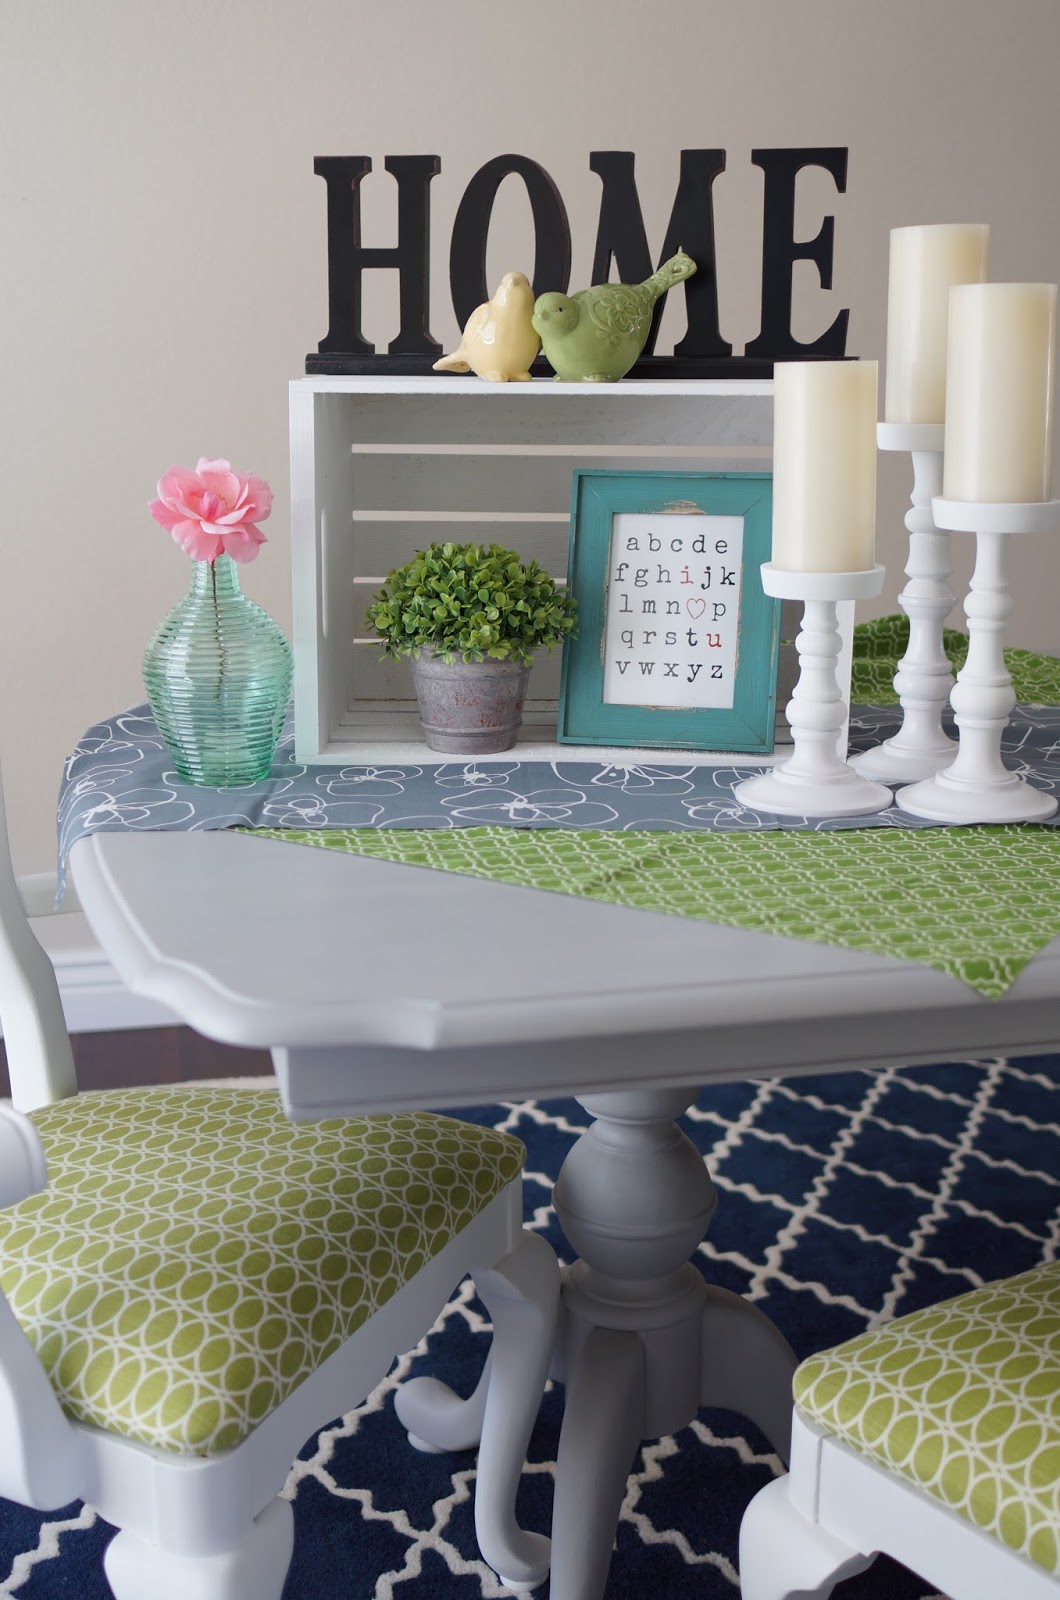
Since I have four chairs done. I decided to see what the finished table looks like. I honestly don't even recognize it. The painting and new upholstery make it look like a brand new table. The details, that I was cursing while painting, look really nice now.
The table that I once hated, has now become a work of art. Get ready for a photo overload!
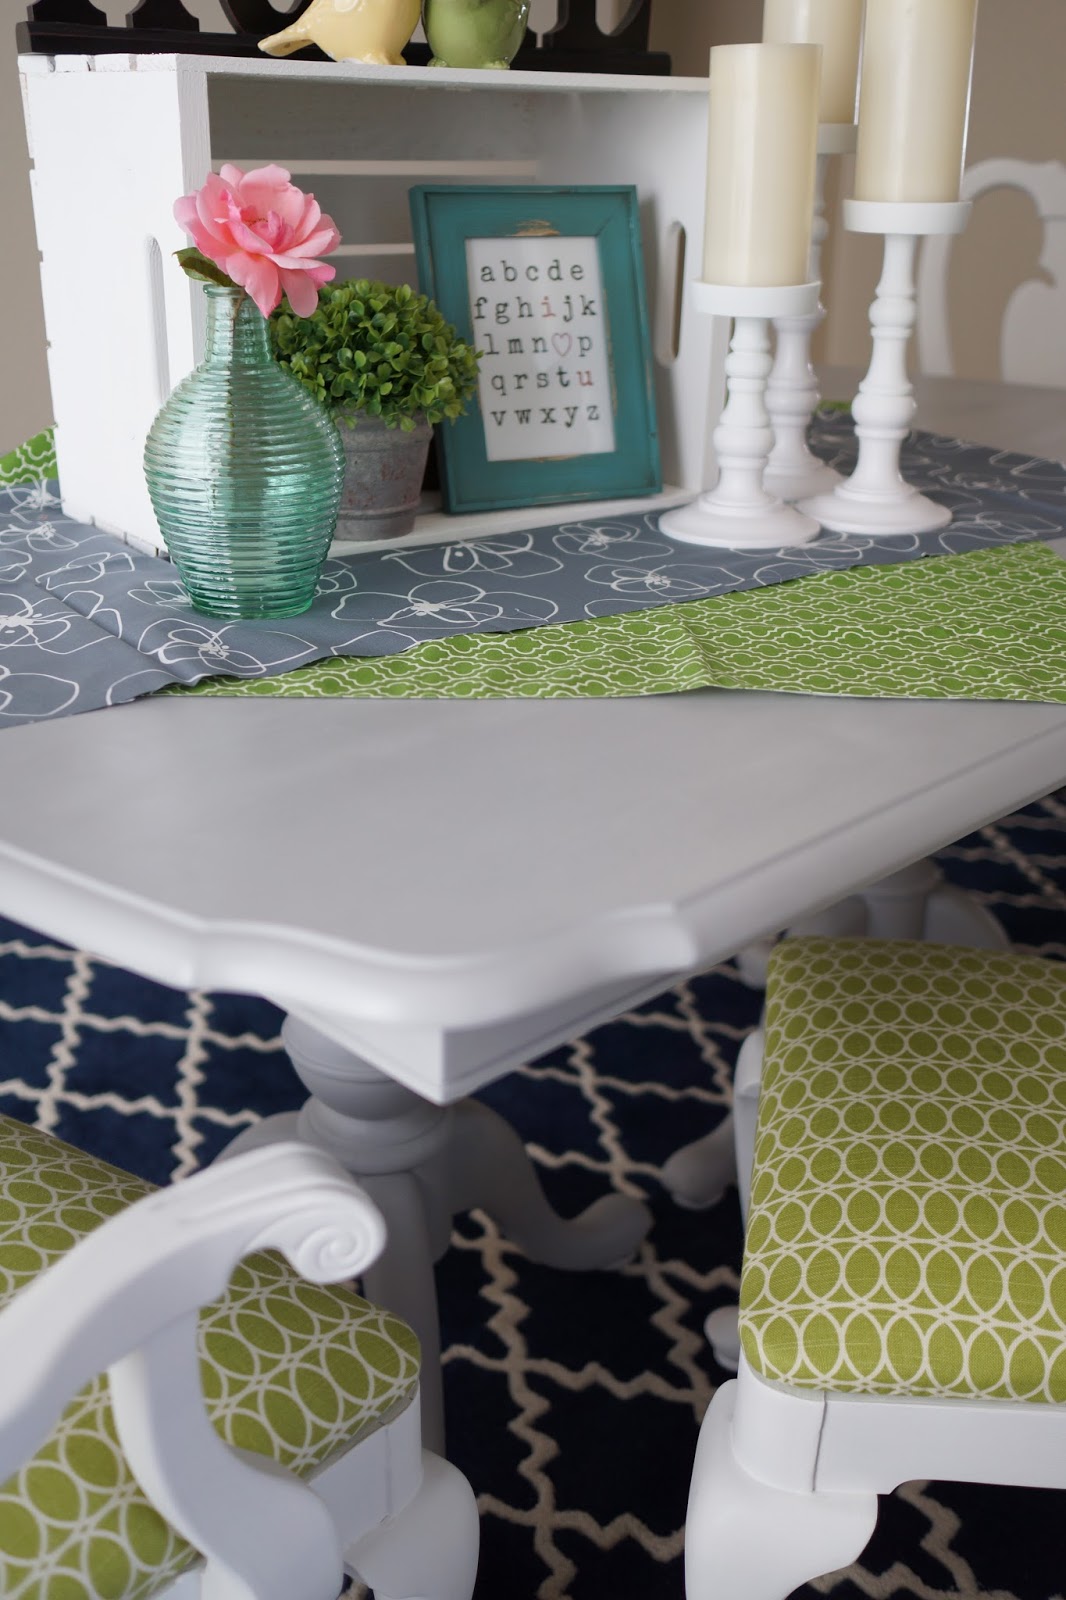

Table leg!! The detail looks AMAZING in the Paris Grey!

Since I ended up with two cans of white paint, I got a wooden crate from michaels (40% off), and painted it with one coat of paint (I was going for the rustic look). I also found some HEAVILY discounted candle stick holders (why are candle stick holders SO expensive?!?!?) and used my white paint on them.
I really love Annie Sloan chalk paint and I would use it again in a heart beat (I want some of the blue colors!), but I wish I would have used a primer on my chairs, or not painted them white. Doing three coats on eight chairs... I'm actually not finished!! It was/is a lot of work!!!
Have you ever started a project thinking that it would be a lot quicker and easier than it ended up being? with out realizing how much work was involved???
Follow me on instagram to see more projects

This is not a sponsored post.
No comments:
Post a Comment