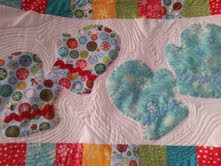
Then I placed mittens where I wanted them and used fabric spray glue to hold them in place. Additionally I pinned them down so they wouldn't pucker and using a size 10 straw needle and single thread I hand sewed them down.
Next, I hand sewed the rick-rack on because rick-rack makes any and everything cuter! After that I sewed all the 2 1/2" squares together and added them to top and bottom of creation. Then, added batting and backing (which also were held down with the spray-on glue and safety pins). I didn't use my walking foot, just changed the length of my stitch to 2.8 and began sewing about 1/4" away from mittens. It was so easy I just kept going.....kind of got carried away.
Lastly, sewed on binding and some little tabs at the top and it took school where it is currently hanging on my white board. I told the kids I use math even when I'm not a school. |


No comments:
Post a Comment